Saturday, October 14, 2017

A slippery mess-Freightliner Part 3

    When this truck arrived I noticed that the oil pan was cracked up front so for the longest time we just had a bucket underneath catching the little drops of oil. So after having received oil pan I decided it was a good time to install it.
 
So there you can get a general idea of where it was cracked and what surprised me was that fact that the pan was made out of fiberglass.


There is the new oil pan. Now for some reason I didn't take any more pictures so that is all I can show you but I ended up not getting to much oil on me and I will assure you that came as a relief to me because I have already pulled an oil pan on another truck and ended up completely soaking myself.
   Well that's it for part 3, stay tuned for number four.


Friday, October 13, 2017

Freightliner- Part Two

So obviously this truck is already done but I figured that I could still show what went into this truck.
     We got a new radiator core and fortunately the old radiator sides where fine so we where able to use those but other then the sides the entire radiator was brand new.
   
                          
 So as you can tell in the picture above, that, that is the new core.

In the picture below you will see the new hardware that came with the core. It had all the fittings and bolts require to completely assemble the radiator.


The entire process of assembling the radiator was very easy and simple. This is the radiator completely assembled.
 
So after we finished assembling the radiator we replaced the fan with a new one since the collision broke the old one.
 
   And then placed the new radiator into it's proper place. In the background you will see the project that we were working on when this Freightliner arrived. So that is it for part two. Stay tuned for number three because there is a lot of action left.


Monday, August 7, 2017

New Project-Part One

Well I'm back. Sorry that I didn't keep you up to date but I got super busy and forgot all about this. So I will brief you on what has happened in the last couple months. My Dad started working on semis at home and since then I have been super busy. Almost everything we work on was involved in front end collisions so we stay very busy. I will show you a previous project before and after and then we'll delve into the current project.

                                                     This was before we started working.


                    This is soon before we got done.  I couldn't find any pics of it completed.

  So that's it for the old and now for the new. This is the latest project that we have started.

 
                                                     The damage is fairly heavy.
 
 
I inspected the entire truck and then proceeded to unhook the batteries since it will be spending a few weeks just sitting.
 
 
                                 I removed the side panel and took off the battery box cover


                                             And then removed the battery cables.
 
Well that's it for part one. Stay tuned for more to come soon.


Wednesday, January 4, 2017

Fixing the Exhaust Leak

  My four wheeler has had an exhaust leak for quite some time now and just in the last several weeks it has gotten progressively worse. So not having anything else to do I went and moved the four wheeler into the garage so I could take the exhaust off of it and fix the problem.
  So having moved it into the garage I went and took that white piece of plastic off so that I could work on it a little bit better.

  So as you can tell it obviously has had an exhaust leak for some time because everything is coated in oil. So I went and got the tools I needed and started working on it.

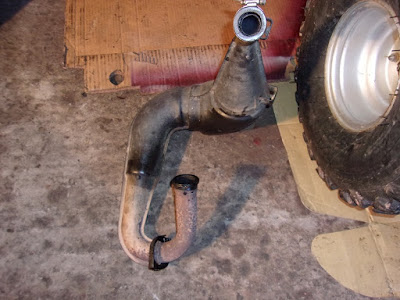
  After getting all the tools I needed I went and took the exhaust pipe off and started cleaning it.

  So as you can tell even the exhaust pipe had oil on it so I got out the good old brake cleaner and several rags and cleaned it all off. The engine block was also ridiculously dirty.

  So I cleaned it off the best I could and then went and put the new seal into the exhaust pipe and tightened it back on.

                          
  So with it all done I started it and looked to see if it sealed up properly. It did and was much, much more quite then before. 
  Well once again a job well done and that's all for this one and I'll catch you on the next one.

Tuesday, January 3, 2017

Making the Tool Table Wrench Friendly

  Well I'm back with a new project. I was given a little roll around tool table several years ago and it just sat around accumulating odds and ends and was basically used for the storage shelves.
  I am constantly working on new projects in the garage and I got tired of having to put tools on the floor while I was working so I decided that I was going to clean the table off and turn it into the ultimate tool table. I didn't do everything I wanted to do to it but its a start.


  So as you can tell it is just the ordinary table with an annoying old fashioned electrical outlet that no longer works and every time you move the table the cord gets stuck so before I did anything else I went and took it off.
  After taking the outlet off I went and measured and cut out a 11x1/2 inch piece of metal and then proceeded to carefully weld eleven nails to that piece of metal.

   Having welded the nails securely in place I went and cleaned it up and then bolted it to the table.


  Having bolted it to the table I looked at it and asked myself what's missing? After several seconds of thought I came up with the solution.

 
  Aha what we need is wrenches! So I went and found myself a small set of wrenches and put the wrench holder to the test.
  Well I am quite happy with how this little project turned out and I'm sure you will spot it in many other projects to come.
  Well that's all for this one and I'll catch you on the next.